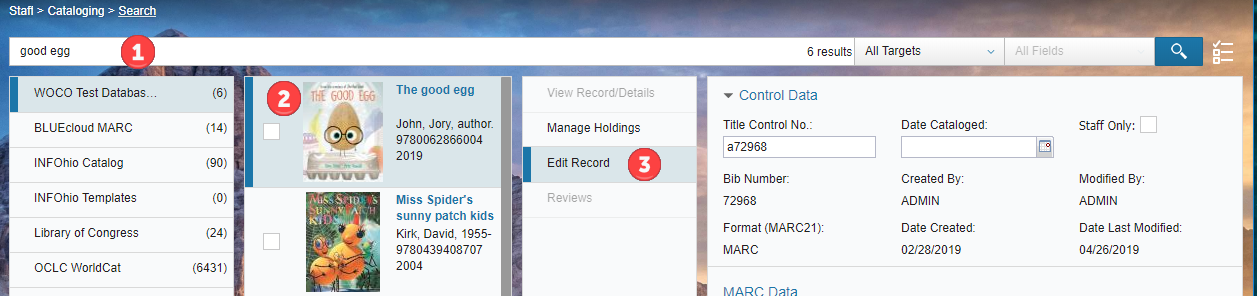
Search using All Targets and then narrow on the left to your district's database or Search your district's database target and employ the All Fields drop-down menu and/or Facets to narrow your search as needed.
Click the title you want to edit.
Verify that you are in Edit Record mode.
If you are, you will see the bib record for that title.
If you are not, click Edit Record to view the bibliographic information for that title.
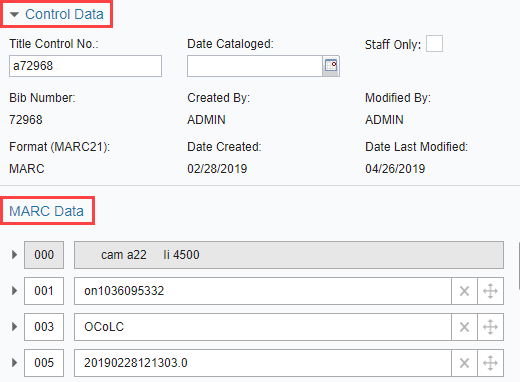
Edit Record contains two sections: Control Data and MARC Data.
Control data includes the fields related to the creation, modification, and display of a bibliographic record. To minimize this section, click the drop-down arrow beside the Control Data heading.
When Cataloging, the Title Control Number will be system generated.
You can enter a Date Cataloged if you would like. This date is recorded automatically when a record is added, or edited to a specific date manually.
Select Staff Only if you want the record to be hidden (shadowed) from the public catalog.
MARC Data allows you to make changes to the bibliographic information of a title. There are a variety of operations you can perform using the MARC editor functions.
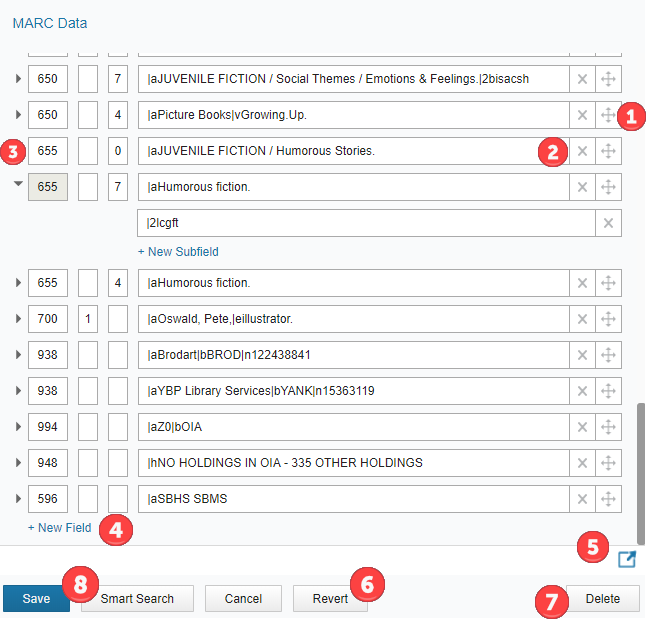
Reorder fields by using the crosshairs icon. Click and drag with your mouse to move the field up or down. Where the field will be moved is indicated by a box with a blue, dashed outline.
Delete fields by clicking the X icon.
Click the delta (or triangle) to the left of a field to expand the tag’s subfields into individual rows.
Hover over a tag or subfield to produce a short explanation of that tag or subfield.
Add a new subfield by clicking New Subfield. A popup screen will open with further information on what subfield codes are available for that tag. Click to select the subfield code you would like to add.
You can also add new fields or tags. At the end of the bib record you will find a link called New Field. Click this to add a new field/tag. Select the field you would like to add and click Add. Enter the field information as needed.
Helps for tags, their subfields and indicators can be found by using the Helper icon. Highlight a tag by selecting it and then click the Helper icon to be given the choice to get help from the RDA toolkit (subscription based) or from the Library of Congress (free).
If you prefer not to save your changes, click Revert and your record will return to its previously saved state. Please keep in mind if you clicked Save at any point those changes will only revert to its previously saved state.
You also have the option of Deleting a Bib record, but be very careful with this function. If there are items still listed on the record, they will be deleted as well. If you currently use discard and have your INFOhio Provider generate a list of discards before removal, you should continue to follow that procedure rather than removing records yourself.
Once you are satisfied with any changes you might have made, click Save. You have successfully edited a bib record within BLUEcloud Cataloging!
Pause and practice editing a bibliographic record on your own.
Search for a title in your district’s database.
Using Edit Record, make the following changes:
Pick a field and with the crosshairs icon, reorder the field to another location in the bib record.
Find a duplicate or unnecessary field and delete it using the X button.
Add a new field by clicking New Field. Choose from the list of available options.
Use the Helper icon to go to the Library of Congress to find out more information about the tag you choose.
Click the delta (down arrow) beside a field to display the tag’s subfields.
Click New Subfield to add an additional subfield. Use the Helper icon if needed.
Click Revert once you are finished if you do not want to save your changes. Click Save if you would like to keep the changes you made.
Once you have finished this lesson, click the Next button to learn about Smart Search. If you have any questions, please contact your INFOhio Provider for help.